Quick and Easy Drip Irrigation for your Garden
- Amanda Nadeau
- Aug 30, 2021
- 2 min read
Updated: May 9, 2023

I spent years gardening without drip irrigation, which looking back makes me shake my head. Why did I not add this time saving and plant saving system to my garden sooner?
I was intimidated by the idea of figuring out how to install drip irrigation. The flood of videos and different methods on the internet were overwhelming. Last winter I added irrigation to my backyard raised beds. I used 1/2 inch tubing, 1/4 inch tubing and emitters. For the front flower beds I wanted to try out drip tubing.

Once I decided to give it a go, I spent quite a bit of time staring at all the different pieces and kits at Lowes trying to figure out what I needed.
I purchased the following from Lowes:
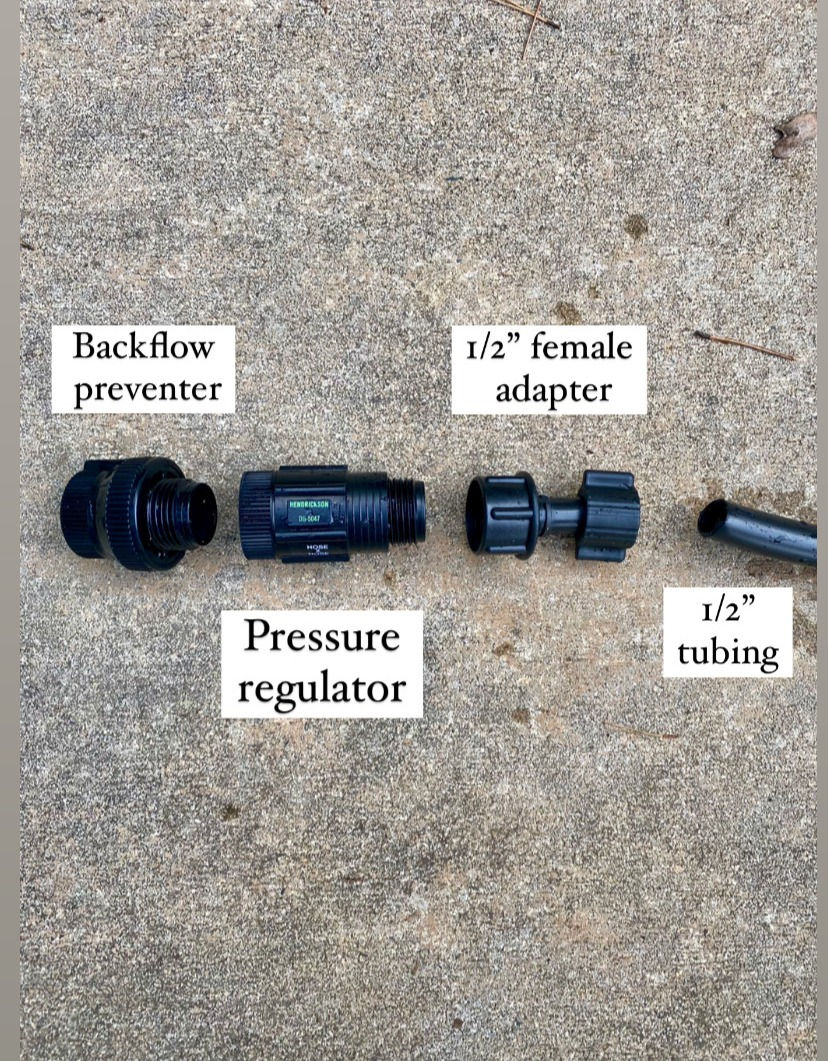
Backflow preventer, pressure regulator, 1/2 inch female adapter, 1/2 inch distribution tubing (50ft), 1/4 inch drip tubing, end caps and goof plugs. I already had a punch tool and 1/4 inch couplings. My total cost before taxes was $56.10. I already own a punch tool and 1/4" connectors, but even with those added the total cost is around $61.65.


My first step was to attach an endcap to the end of the 1/2 inch distribution tubing and then laid out the tubing along the backs of the flower beds. Landscape pins work great to keep the tubing in place. 50 feet was more than enough length for my project but the distribution tubing also comes in 100 ft coils.

Next I used the punch tool to place a hole in the 1/2 inch tubing along the backs of the beds. I used a large insulated cup of very hot water to soften the end of the 1/4 inch drip tubing to make it easier to attach one of the couplings.
Once the coupling is attached to one end of the 1/4 inch tubing I can pop it into the hole made with the punch tool in the 1/2 inch tubing. Easy!

I ran the 1/4 inch drip tubing throughout the raised bed and simply cut it to the desired length I need in the bed. I again use hot water to soften the cut end of the 1/4 inch drip tubing and then place a goof plug in the end. This prevents water from pouring out of the end of the tubing.
The backflow preventer screws into the pressure regulator and then on to a female hose adapter. See video below for how to connect.
Next, the 1/2 inch distribution tubing is connected to the female hose adapter and then I can screw on the water source hose when I am ready to water.
Because I don't have a dedicated water source near these raised beds, I will have to pull out a hose from the side of the house and connect it to my irrigation system each time I want to water. This is still better than hand watering for sure.
The entire project including the trip to Lowes took only a few hours. The cost of this project is worth every penny to not have to keep hand watering these raised beds.
Comments